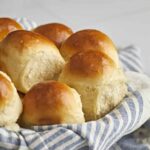
Sea Salt & Herb Skillet Rolls
Rating
If you’re looking for a flavorful upgrade to ordinary dinner rolls, try these sea salt & herb skillet rolls. They certainly steal all the attention from the main dish on the table!
Ingredients
- 1 cup (240ml) whole milk, warmed to about 110°F (43°C)
- 2 and ¼ teaspoons active dry yeast (1 standard packet)*
- 2 Tablespoons granulated sugar, divided
- 1 large egg, at room temperature
- ¼ cup (4 Tablespoons; 60g) unsalted butter, melted + slightly cooled and divided
- 1 teaspoon salt
- 2 teaspoons each: dried rosemary, dried basil, & dried parsley*
- 1 teaspoon garlic powder (or 2 teaspoons minced garlic)
- 3 cups (390g) bread flour (spoon & leveled), plus more for work surface
- flaked or coarse sea salt, for topping
Instructions
- Prepare the dough: Whisk the warm milk, yeast, and 1 Tablespoon sugar together in the bowl of your stand mixer. Cover and allow to sit for 5 minutes. *If you do not own a stand mixer, you can do this in a large mixing bowl and in the next step, mix the dough together with a large wooden spoon/rubber spatula. It will take a bit of arm muscle. A hand mixer works, but the sticky dough repeatedly gets stuck in the beaters. Mixing by hand with a wooden spoon or rubber spatula is a better choice.*
- Add the remaining sugar, egg, 2 Tablespoons butter, salt, rosemary, basil, parsley, garlic powder, and 1 cup flour. With a dough hook or paddle attachment, mix/beat on low speed for 30 seconds, scrape down the sides of the bowl with a rubber spatula, then add the remaining flour. Beat on medium speed until the dough comes together and pulls away from the sides of the bowl, about 2 minutes. If the dough seems too wet to a point where kneading (next step) would be impossible, beat in more flour 1 Tablespoon at a time until you have a workable dough. Dough should be soft and a little sticky, but still manageable to knead with lightly floured hands.
- Knead the dough: Keep the dough in the mixer and beat for an additional 3 full minutes or knead by hand on a lightly floured surface for 3 full minutes.
- st Rise: Lightly grease a large bowl with oil or nonstick spray. Place the dough in the bowl, turning it to coat all sides in the oil. Cover the bowl with aluminum foil, plastic wrap, or a clean kitchen towel. Allow the dough to rise in a relatively warm environment for 1-2 hours or until double in size. (I always let it rise on the counter. Takes about 2 hours. For a tiny reduction in rise time, see my answer to Where Should Dough Rise? in my Baking with Yeast Guide.)
- Grease a 10-12 inch oven-safe skillet or 9×13 inch baking pan. If using cast iron skillet and it’s already seasoned, no need to grease it. You can also bake the rolls on a lined baking sheet.
- Shape the rolls: When the dough is ready, punch it down to release the air. Divide the dough into 12 equal pieces. (Just eyeball it– doesn’t need to be perfect!) Shape each piece into a smooth ball. Arrange in prepared skillet/baking pan or a couple inches apart on a lined baking sheet.
- nd Rise: Cover shaped rolls with aluminum foil, plastic wrap, or a clean kitchen towel. Allow to rise until puffy, about 45-60 minutes.
- Adjust oven rack to a lower position and preheat oven to 350°F (177°C). (It’s best to bake the rolls towards the bottom of the oven so the tops don’t burn.)
- Bake the rolls: Bake for 23-27 minutes or until golden brown on top, rotating the pan halfway through. If you notice the tops browning too quickly, loosely tent the pan with aluminum foil. Remove from the oven, brush warm rolls with remaining melted butter and sprinkle tops with sea salt. Cool for a few minutes before serving.
- Cover leftover rolls tightly and store at room temperature for 2-3 days or in the refrigerator for up to 1 week.
All rights and material belong to owners sallysbakingaddiction.com


